
Last Update – Apr 18, 2019
Migrating your website to a new hosting account can seem complex and people pay a lot for professionals to migrate their website
If you don’t have the budget to pay for a professional then don’t worry we have got you covered with our step by step instructions. Things might get technical at times but if you are well prepared with our instructions then you can easily migrate your website without any issues.
In this post we will discuss how to migrate your WordPress Website through “All-in-One WP Migration” plugin.
Below steps are written assuming that your old hosting account has not expired and you have already purchased a plan with your new host.
Export your original WordPress Website through All in One WP Migration Plugin
1. Initially make sure that All-in-One WP Migration plugin is installed and activated in your WordPress website.

- Next step is login to your wordpress site and from the left menu select “All in One WP Migration”
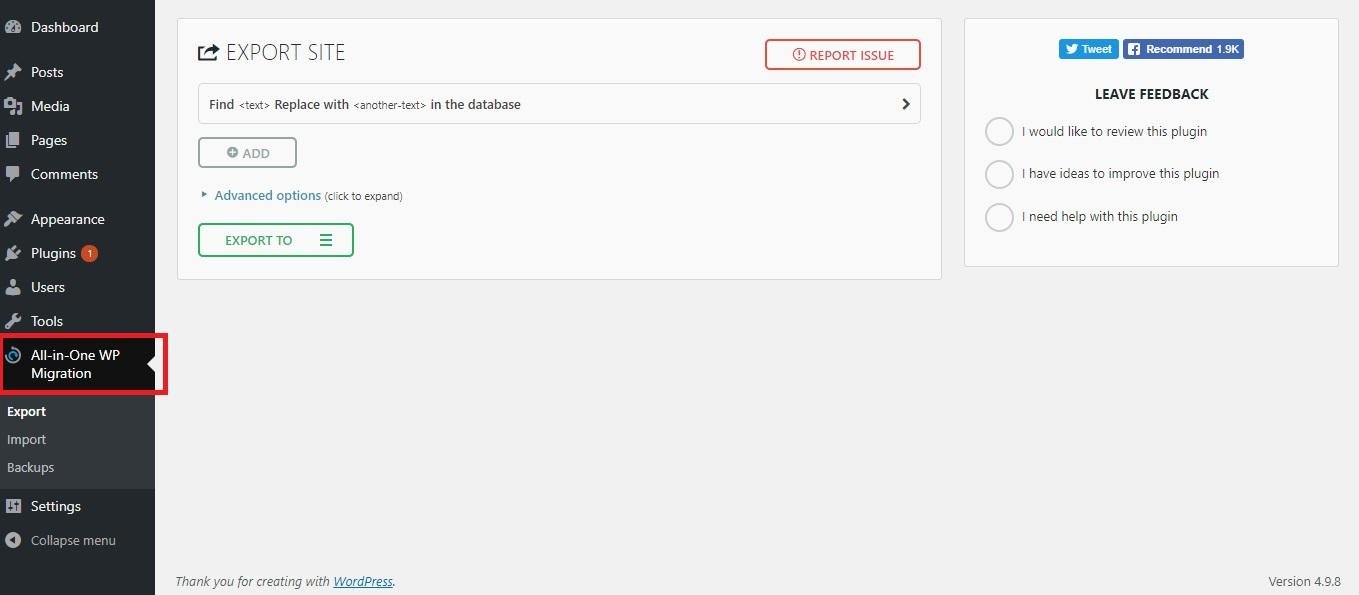
- From the “All in One WP Migration” dashboard select “Export To” and then select “File”
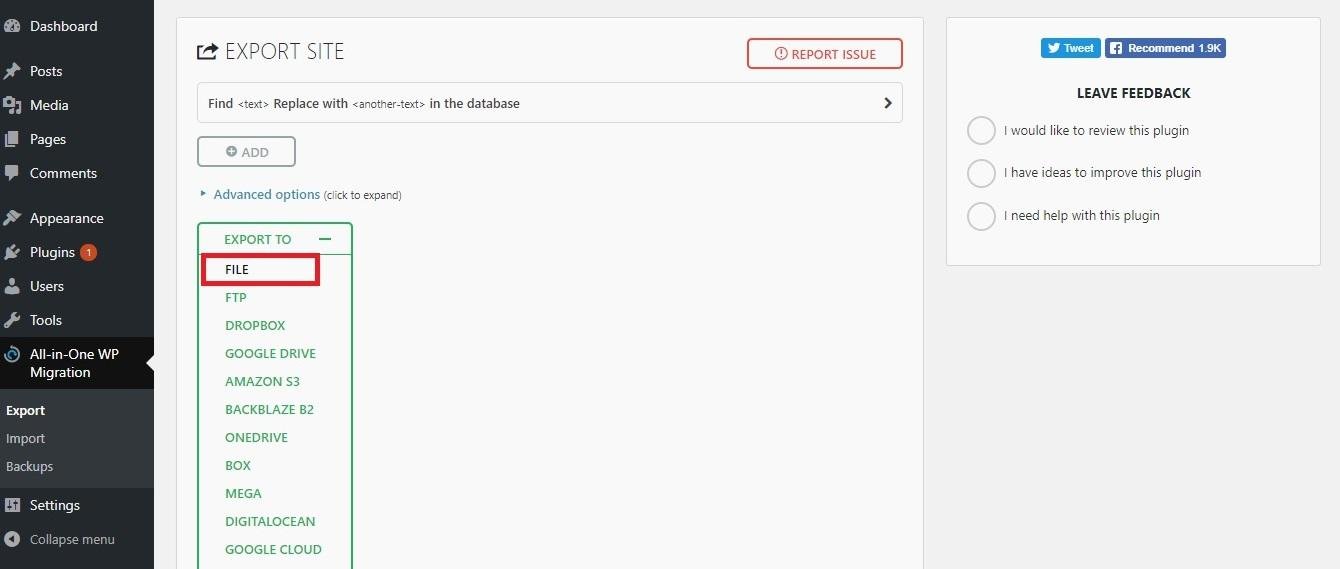
- Wait for some time until the plugin does it work and then you will get the pop up to download the files. Just click on “Download www.example.com” button to download your website files in .wpress format

ADD DOMAIN TO YOUR NEW HOST
- Navigate to the cpanel of your hosting account where you want to migrate your website and add your domain here. For that just go to “Domains” section in Cpanel and select “Addon Domains”

2. Just add the name of your domain under “New Domain Name” text box and click on “Add Domain”

3. Your Domain will be still be pointing to the previous hosting provider. You need to replace the name
server of that domain to your new hosting providers name server
4. The process to change the nameserver will depend on your hosting provider, but the basic process is
same which is you need to access your domain management settings and look for options to change the name server

3. After changing the nameserver, Install WordPress to this domain from Cpanel
Import your original website files into your new host
- In your newly installed WordPress website, first install and activate All-in-One WP Migration plugin.
- From the left menu select “All in One WP Migration” and select “Import” link

3. From the “Import Site” dashboard select “Import From” and then select “File”

4. Now import the .wpress file that you downloaded from your original website and wait for the plugin to complete importing your files
- Once the import has been finished, you will get a pop up saying “Your data has been imported successfully” and “You must save your permalinks structure twice” in order to proceed further. Just click on “Permalinks Settings”

- After clicking on “Permalinks Settings”, you will be logged out of the WordPress website and you need to log in again. Since we have imported all the data from your original website you can use the old credentials to log in to your WordPress website
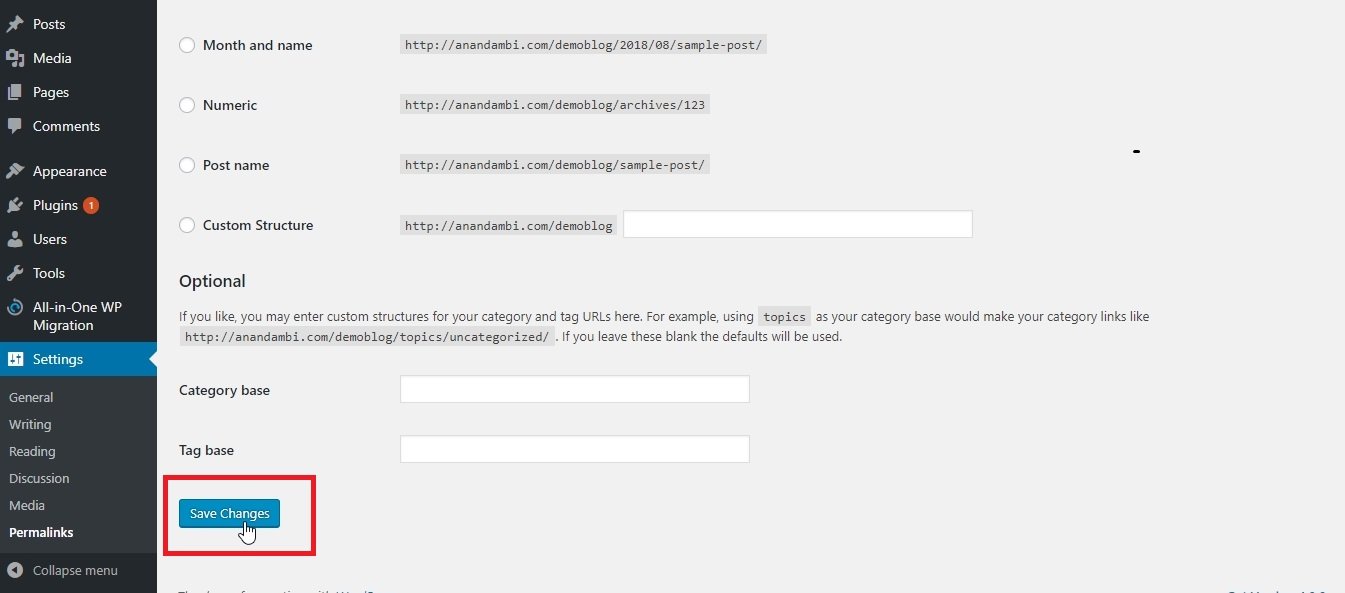
- After you log in to your wordpress website, you will be directed to “Permalink Settings” page. Don’t do anything here just click on “Save Changes” button and you are done with your website migration
Conclusion
We hope that our step by step tutorial helped you to migrate your wordpress website to a new host without much difficulty. If you face any issues when you are migrating your website please let us know in the comments, we will be able to help you


3 thoughts on “How to migrate your WordPress website to new hosting account”
Informative blog! Thanks for sharing it.
Wow Amazing Article. Thanks for sharing us this knowledge. Your Article is really helpful for me.. Thank you so much
There are so many posts on the Internet about migration. But It was a very complex process.
Thank you Pardeep Goyal!