
Photography is a great art that helps you express your ideas and views through the creative capturing of images. Artistic photography helps us discover, understand and read nature, trees, wildlife, humans, events and expressions.
There are several dedicated platforms and social sites for photographers. Like Instagram, SmugMug and Flickr but then, they are still owned by someone else.
You need to have your own space.
Start a photography blog if you have the passion and an eye to capture the unique & creative ideas and moments.
But before venturing you should make sure you know the niche because clicking & capturing everything will be a waste of hard effort.
How to Start a Photography Blog in 2022
Step #1. Micro Niches To Start A Photography Blog
- Aerial Photography
- Architectural Photography
- Automotive Photography
- Food Photography
- Fashion Photography
- Wildlife Photography
- Product Photography
- Underwater Photography
- Fine Art Photography
- Landscape Photography
- Sports Photography
- Travel Location Photography
- Drone Photography
- Professional Camera
- Mobile Photography
- Still Life
- Portrait
- Panorama
- Moving Pictures
- HDR Photography
- Head Shots
- Macro Photography
- Long Exposure
- Wedding Photography
- Celebrity Portraits
- Events Photography
- Personal Vacation Photos
#5. Photograph Editing Software
- Adobe Lightroom
- Adobe Photoshop
- Adobe Premiere Pro
- Corel Paintshop Pro
- ACDSee Photo Studio Ultimate
- Skylum Luminar
Step #2. Choose Domain Name For Your Photography Blog
My analysis of photography blogs suggests that domain names are either personal names like “David duChemin” or words related to creativity and photography terms like “creative boom”, “Photo focus” and “Two Loves Studio”.
But your name-based domain might not help in correlating with the target niche. It takes time to create a recognizable brand. It is really tough to position a photography blog with a name-based domain.
It is better to be creative and use word combinations for your photography blog. You can use domain name finding tool Leandomainsearch.com to get domain name ideas.
For example, the tool returned the following domain name suggestion for the word “Photo”.
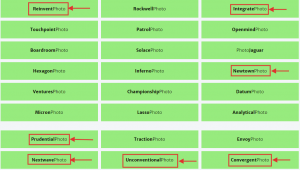
Try to find a word relatable to your sub-niche.
If you are still not able to find a suitable domain name then you can start with any domain name.
I too started my blog with the domain name “wisebaniya”, then I changed it to “moneysparkle” but still I was missing the connection.
Finally, I got the right combination in the domain name “CashOverflow”.
The other things which you should keep in mind before finalizing the domain name are;
- Pick a .com extension: If it has already been taken you should go for any other extension.
- For a country-specific audience go for that country’s extension. For example, for blog audiences in India go for .in extension and likewise for a US-based audience you should choose a .us extension.
- Avoid domain names with hyphens and special characters, because your audiences may find it difficult to spell and remember.
- Avoid words that are difficult to spell and hard to remember.
Step #3. Buy a Hosting for Photography Blog
You should avoid free hosting because in free hosting you do not own the site.
You are given a subdomain, like “mysite.yoursportblog.com”, which looks totally unprofessional.
In free hosting space, you do not have access to the control panel. On top of that, the server speed slows down with time.
There will be NO help and support options. To make things worse, free hosting does not give you the flexibility to design your website and has limited functions.
A good idea is to buy hosting space from the safe and reliable hosting service provider having quality customer care.
I would recommend my favorite Siteground hosting to use for your photography blog.
Siteground gives you a safe hosting space on their high-speed servers. Your website loads faster on their solid-state drives (SSD) and free content delivery networks (CDN).
All the shared hosting plans from Siteground are protected from hackers and brute force attacks using HTTP/2 tech and AI security bots.
You get a free SSL “Lets Encrypt” certificate and assistance from quality customer support agents.
Click here to buy Sitegroung at a discounted price
Steps To Buy Hosting From Siteground
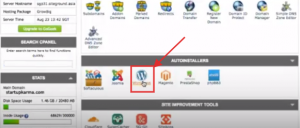
Step 1: Go to Siteground website and select “Web Hosting”
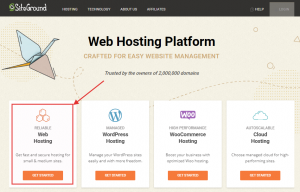
By purchasing web hosting you get hosting services for your blog on the Siteground’s shared servers.
Step 2: Select GrowBig Plan

GrowBig plan is for starting level growing websites. You get enough resources for starting a growing blog, like;
- Hosting more than one website
- Having 20GB of webspace
- At a time, the plan can handle up to 25K visitors
On the other hand, you can host only one website on StartUp Plan having limited resources.
The GoGeek Plan has higher resources and is best suited to high traffic websites or to support the portfolio of growing websites.
Step 3: Register or Enter Domain Name
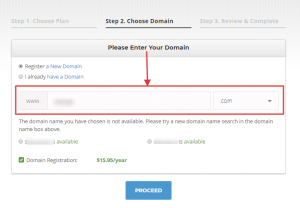
You should not get a domain name registered from your hosting service provider for the following reason:
- In case of website transfer, you may want to shift the domain registrar also which can be confusing.
- For a portfolio of websites, managing domain at the registrar is better.
- For added security.
Name Cheap is a good option for registering a domain name.
Step 4: Select Plan Period and Complete Purchase
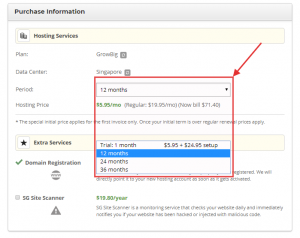
Here you can select the hosting plan period from 12, 24 or 36 months. Siteground GrowBig plan has a fixed transparent price of $5.95 per month irrespective of the plan period.
Next, you will require a WordPress setup to see your blog live on the internet.
Step #4. Technical Steps To Setup Your Photography Blog
Installing WordPress, themes and essential plugins make your photography blog go live and functional.
Install WordPress
You can create beautiful websites by installing a free content management system of WordPress.
You just need to go to the control panel and click on “Install WordPress” to create a blog.
Some hosting services provide a pre-installed WordPress, but that entirely depends upon your hosting provider.
WordPress is used to create web pages, posts and add images. Further, WordPress lets you install themes & plugins, to help you customize and change the appearance of your blog.
Setting Themes
Themes include layout, style elements and color schemes. Themes provide the overall look and feel of the website.
The next section contains a list of the best WordPress themes for photography blogs. You can check and choose the theme which fits your microphotography niche. I would suggest you to choose a SEO optimised theme for your blog.
However, when starting a blog you should not waste precious time in finalizing the theme.
Instead, you should pick up a free theme or any reasonably priced theme and focus more on other important things like content & growing your blog.
Make sure that whatever theme you choose, the website should
- Have a responsive design
- Open with the help of any browser
- Be easy to navigate
- Give a professional look and have a proper structure
Steps to Install a Free Theme
You need to go to the dashboard> “Appearance” menu and select the option theme.
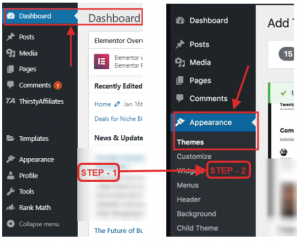
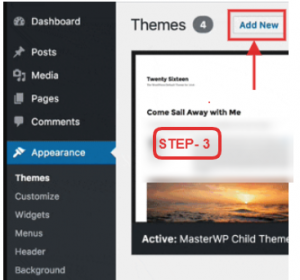
Next, you can select one from the list of themes and click on add new.
Steps to Install a Paid Theme
- Download the theme file from the theme website
- Click on upload theme
- Choose the theme file
- Click on install
Once the installation is done, click on the “Activate” button to make the theme functional.
Installing Necessary Plugins
Plugins give you the much needed additional features. They are helpful for having extended functionality. For example protection against spamming, incorporating SEO features, creating an e-store and many more.
Further, as you grow you may require advanced plugins like email marketing or affiliate marketing plugins.
In the initial phase, you can start by installing only necessary plugins, the list of which is as under:
- Akismet
- JetPack
- Yoast SEO
- TinyMCE Advanced
- WP Smush
- Shortcodes Ultimate
- Mammoth .docx converter
Additional Plugins for Photography Blogs
Easy Watermark Plugin
The plugin allows you to automatically add a watermark to the image. Thus protect them from misuse. Simply choose an image, set transparency, and watermark position.
WordPress Gallery Plugin/ FooGallery Plugin
To create a helpful photo portfolio gallery with bite-sized image descriptions. The plugin helps showcase various photography genres.
W3 Total Cache/ Dedicated CDN
To cache static and other frequently used contents. Thus helping the website to load considerably faster.
Best WordPress Themes For Photography Blogs
- Photography WordPress
- Simplicity
- Iconic
- Tripod
- Patti – Parallax One Page
- Camer
- Himalayas
- Moon
- Travis – WP
Check out – How to start lifestyle blog
10 Different Ways To Make Money From Photography Blog
#1. Sell Stock Photos
Your photographs are your asset. The best thing about photography blogs is that you can create a photo gallery and sell stock photos.
But first try to learn to sell your photographs on sites like Shutterstock, iStock and Unsplash. This is a great way to get more information and ideas on “What images are selling?”.
#2. Online Tutorials & Workshops
Online classes are helpful to monetize photography blogs even when you have a small number of audiences. They help increase engagement and value creation.
Leverage your experience to teach
- Basics to beginners
- Using camera
- Equipment
- Natural light
- Creative process
- Managing digital asset
- Photo editing
- Taking strong photographs.
#3. Contributors on Photography Blogs
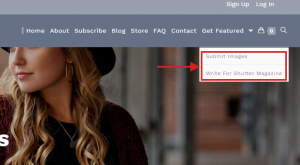
Use your blog to offer freelance photography services. You can write, click photographs and post images on other photography blogs and online magazines.
#4. Sell Own Products

Selling your own products helps you start creating your own brand. With little investment in printers and materials, you can create photo-based products and sell them through your blog.
Examples of photo-based products are Photo books, Photo wall decor, Photo calendars and custom photo cards.
#5. Brand Collaboration
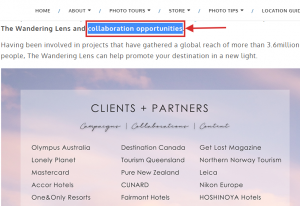
Businesses in camera & equipment, Tourism, Auto, Sports, Smartphones, Food, Non-Profit Companies, Hospitality, Airlines, Media look for creative photobloggers for collaboration.
While you earn money, companies benefit from new customers and enhanced brand awareness.
Brand collaboration is a long-term engagement. So, before you start a campaign, make sure that the products are in line with your micro-niche. Do not promote totally unrelated products and services.
#6. Sponsored Posts
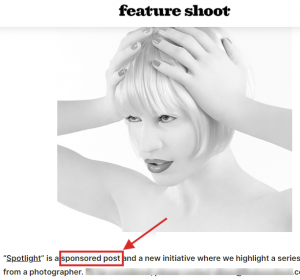
Sponsored posts and reviews help audiences discover useful equipment and build closer engagement.
Equipment examples include Cameras, Camera bags, Drones, Film and analogs, Lenses, Lighting equipment, Mobile, Printers and Photography software.
Before doing a sponsored post ensure that the products are helpful to your audiences and are in line with your photography micro-niche.
#7. Estores
Estores on WordPress blog can be created using the Woocommerce plugin. Use the store to list your recommended camera, gears, prints and posters.
Other things which you can list are artifacts, photographic designs, art objects and accessories.
#8. Ebook & Guides

Monetize your blog by creating ebooks and guides. That can be done by converting your photography event checklists into easy downloadable digital products. The beginner’s tutorials can be made into guides and ebooks.
Create photo books of destinations, events and festivals to sell.
#9. Affiliate Marketing
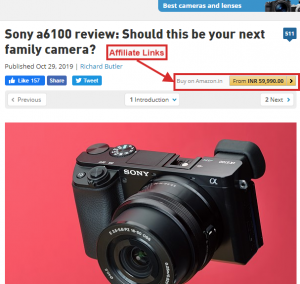
Using affiliate is a cost-effective way to monetize the blog. Where you do not need to create your own products. Neither you need to worry about inventory nor shipping.
Examples of products that you can market are Power & Batteries, Shoulder bags, Backpacks, Photography gloves, Camera flashes, Lenses, lens hoods, Memory cards, UV, Clears, Tripods and Skylight filters.
But you need to promote niche related products. You should promote those products that you have used and are genuine or you know someone who has used and benefited from the product.
#10. Google AdSense
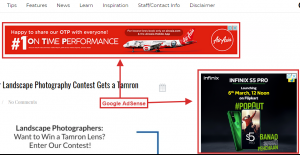
The empty website spaces on the right side and bottom of web pages can be used to display ads. Google pays $0.5 to $10 for your allotted space through the AdSense program. Which is very less and depends on geographic location.
But I do not recommend you to use Google AdSense for monetization. Because you do not have any control over the type of ads getting displayed.
Display Ads divert the blog traffic and give an unprofessional look. Further, they are also responsible for your website getting slow.
Get First 1000 Visitors In 30 Days on Your Photography Blog
You can pull traffic to your photography blog in two different ways, through Social media and Google.
Just like any other website, your photography blog will also take some time to rank on Google. Meanwhile, you can attract traffic to your blog using social media channels.
Getting readers and their feedback is important for you to understand user intent, their expectations and establishing connections. You can read social media growth case study.
#1. Get Visitors Through Social Media
You should explore various social groups and forums to find initial audiences. In the beginning, you need to provide value to the group by helping people and solving their problems.
Then only you can expect things in return. Your primary aim should be to build relationships and not spamming the group with your blog promotion.
For example, you can use Instagram to find an initial audience.
On Instagram, you can explore relevant groups and communities using hashtags. A simple way to find a community is to search Instagram with “#photography or #photographycommunity”.
For example, you get the following results when you type “#photography”;
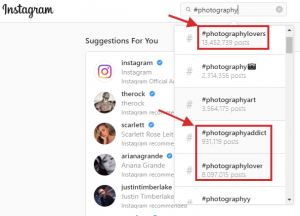
You can engage with the audiences of popular blogs, communities, niche groups and competitors by following them, liking & commenting on their photos. The chances are that some of them will follow you back and visit your blog.
#2. Using Email Marketing
Email marketing is a great medium to find engaged audiences. Use it to reach out to photography enthusiasts.
Deliver useful personalized content. In return, politely ask them to share information about your blog with others.
#3. Publish Regularly
While you are promoting on social channels, do not forget to post regularly. You should cultivate the habit of creativity publishing regularly.
Once you have enough volume, Google will start indexing your blog and bring organic traffic.
Conclusion
The photography blog opens up your artistic and creative mind to the world. Where you can express, communicate and engage with people through images.
Your passion for capturing stunning visuals and eye-catching moments needs an outlet. The blog opens up the opportunity to share, understand and help fellow photographers.


